June 7th, 2022
The implementation of a digital signature enforcement is abbreviated as (DSE) in kernel terminology. Most of the bypasses are based on exploiting a vulnerability in a legitimate EV signed driver to manually map a "driverless" non signed driver that patches kernel memory and disables digital signature enforcement. If you try load an unsigned driver without disabling, you'll get an error 0xC0000428 STATUS_INVALID_IMAGE_HASH.
The official way to disable DSE is to enable test signing:
- Bcdedit.exe -set TESTSIGNING ON
- Bcdedit.exe -set TESTSIGNING OFF
As of March 2022 Microsoft is adding a new vulnerable driver blocklist feature to Windows Defender that prevents those drivers from loading. MS is revoking leaked certs when found as well and distinguishes those updates as a "quality improvements" such as KB5013942. If you attempt load the driver with a revoked certificate, the following error will popup: 0xC0000603 STATUS_IMAGE_CERT_REVOKED. In the end, the public solutions that bypass DSE are becoming obsolete.
DSE bypass
In order to bypass DSE, you'll need to find a virtual address of CI!g_CiOptions in the kernel memory. This is a global system variable. The value of a byte at CI!G_CiOptions specifies whether or not to allow unsigned drivers to load. Setting the value to zero will turn off the DSE.
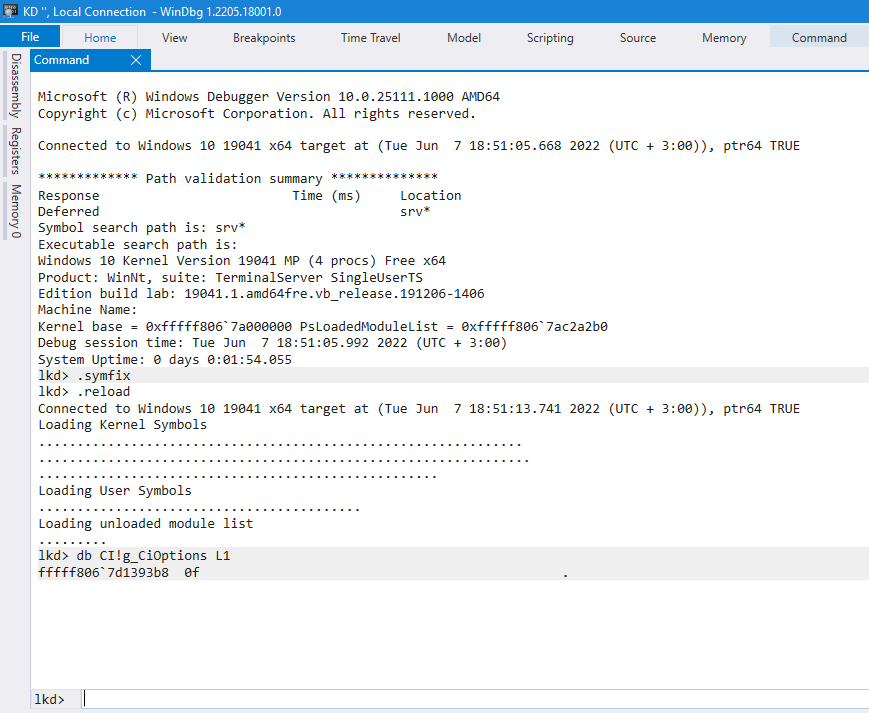
The easiest way is to use the local kernel debugger as it comes with up to date symbols for the kernel itself and kernel "built-in" modules loaded by the kernel such as CI.dll.

lkd> .reload
lkd> db CI!g_CiOptions L1
lkd> FFFFF8067D1393B8 0F
The result is a virtual address of a global system variable CI!G_CiOptions in kernel memory (bolded above) and then the current value of DSE in hex.
Setting the value to zero will disable DSE and restoring the value back to the original restores code integrity checks (CI). The modification is subject to PatchGuard BSSO unless you revert the change.
You can bypass DSE also using the local kernel debugger as shown above but enabling kernel debugging is not always an option.
kd> ed CI!g_CiOptions 0 0
The above command sets the first byte to 0 at that address.
The kernel driver has a direct access to the kernel memory and you can read and write the kernel memory also as an internal C++ DLL does. If the address to be modified is not valid, a BSDO will occur.
The screenshot below represents DATA/STRUCTURES mode in the HEX DEREF software and shows how the variable looks like in the professional version memory viewer:

The biggest difference vs WinDbg is that the software is capable of finding the structure of classes in memory without source code or symbols and the offsets
are automatically applied to a given address. This functionality allows you to restructure undocumented windows kernel structures.
The tool can draw kernel memory in real time and of course you can edit arbitrary kernel memory as well. This will speed up dynamic kernel and malware analysis significantly.
How to find the virtual address of a DSE byte after a reboot?
The kernel uses address space layout randomization (KASLR). The kernel is loaded to a random location in memory on each reboot. You can bypass KASLR easily with a little bit of assembly knowledge.
I'll update the article with a source code example on my GitHub.
Now that we know the virtual address of the DSE byte. There are four (3) options (knowledge of reverse engineering is required).
For the sake of repetition, we will go through 1) and 2) in this article.
- 1) Use HEX DEREF PRO to dynamically reverse engineer the instruction address that refers to the DSE byte in kernel memory (the easiest and fastest solution)
- 2) Set a breakpoint (BP) to that address with the kernel debugger to find the instruction address
- 3) Dump the kernel with HEX DEREF PRO and analyze the dumped ntoskrnl.exe in IDA or Ghidra and load pdb
#1
g_CiProtectedContent has a pointer to CI!g_CiOptions. After the initial analysis has finished in IDA PRO for CI.dll and the PDB has been loaded:
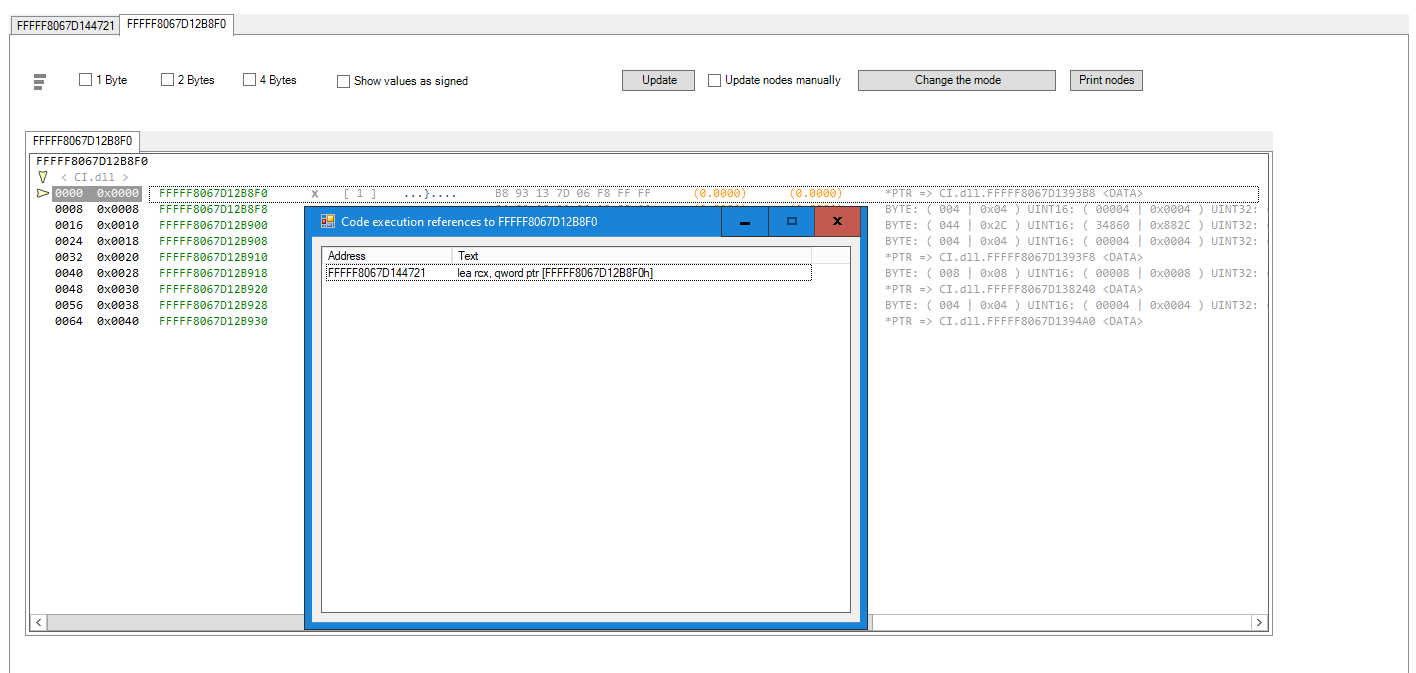
Similarly to IDA PRO, the code needs to be analyzed in HEX DEREF PRO as well if you want to see XREF's in the memory viewer. The "X" refers to the code execution reference (XREF) in the memory viewer
As shown in the image below. 0xFFFFF8067D12B8F0 is the virtual address of g_CiProtectedContent and it has a pointer to 0xFFFFF8067D1393B8 which is the virtual address of CI!g_CiOptions

You can generate an unique assembly signature for an instruction by right clicking the instruction address in the memory viewer.

The author of the article is a hobbyist security researcher and lead developer of the HEX DEREF software. The information is for educational and informational purposes only. The author cannot be held responsible for how the information is used. The lab was performed on Windows 10 Pro 21H2 (19044) Hyper-V virtual machine.